


As an owner and regular user of my Arizer Solo Portable Vaporizer, I was eager to get my hands on a stationary vaporizer with similar build quality. Thanks to Steve at Arizer, that’s exactly what I received, a complementary Extreme Q vaporizer to use and review. I’ll save you the suspense: for the price, this is a great stationary vaporizer that has both a whip and bag system.
Arizer Extreme Q Build Quality
Let’s be honest, when you think about the gold standard of stationary vaporizers, the Volcano immediately comes to mind. The Volcano has German build-quality which can withstand Amsterdam coffee shop use and abuse. I’m fairly confident that the Volcano vaporizer will survive the human race to inherit the earth with the cockroaches. Of course robustness comes at a price, and the Volcano is expensive, with most models costing over $500. For the rest of us don’t need to pay the 200-500% premium for a family heirloom vaporizer to pass down to our grandchildren, the Arizer fills this niche very nicely with the Extreme Q vaporizer… and then some.
The Arizer is a solid piece of equipment, and honestly comparing the Arizer Extreme Q to the Volcano is a bit unfair, because you can purchase 2-5 Arizer Extreme Q’s for the price of 1 Volcano. The good news is that the Arizer Extreme Q is built “just right” for the consumer segment.
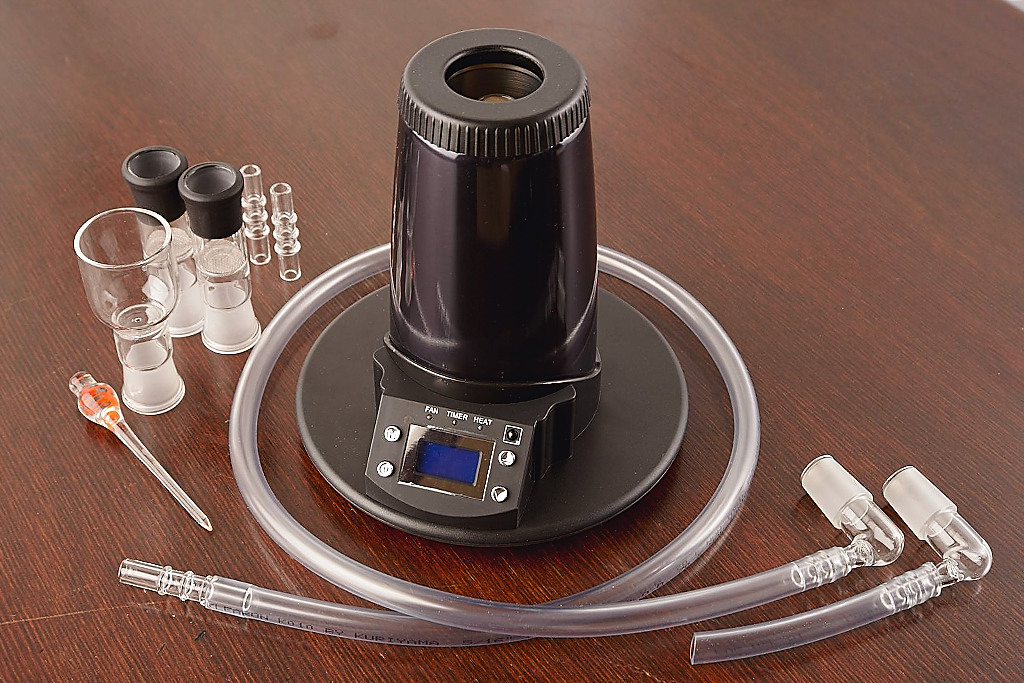
The Arizer Extreme Q comes with both whip and bag attachments and heats up quickly using a digital temperate control (in both Fahrenheit and Celsius). A remote control is included, which at first seems a bit ridiculous, but the remote turns out to be very convenient when you are using the Extreme Q in a group setting or when you want to quickly choose a fan speed setting without running through multiple digital menus.
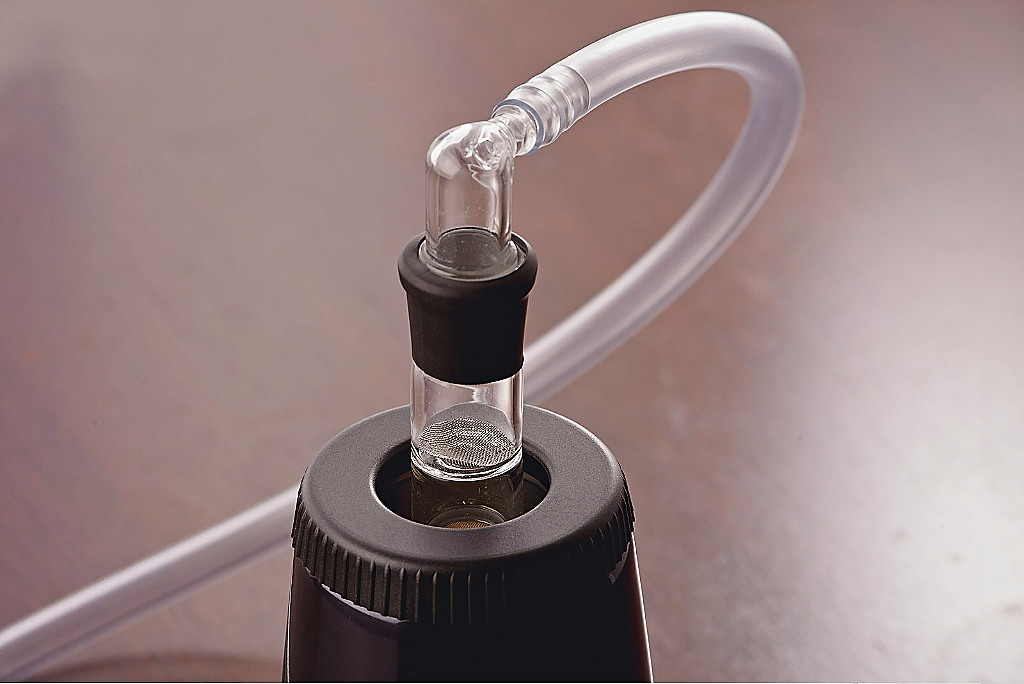
To setup for a vapor session, you first need to put the glass “cyclone” bowl on top of the heating element. Next, the weed goes into the cyclone bowl capped by either the bag or whip glass elbow piece. Expert tip: go with the “elbow pack” to get a better vape session. An elbow pack is basically jamming your weed up into the small screen in the elbow glass rather than let it lie loosely on the bottom of the cyclone bowl screen. Your weed will be upside down in the bowl, but the pack will keep it from falling out. The theory here is that the elbow pack forces the hot air through all of your weed for a more complete vape, while the loose pack on in the cyclone bowl allows some of the hot air to flow around your weed.
How to Use the Arizer Extreme Q Vaporizer Whip
- Setup the vaporizer with the cyclone bowl (rubberized side up so you don’t burn your fingers ashing later).
- Pack in your weed.
- Top the cyclone bowl with the Whip glass elbow.
- Power up the Extreme Q and choose your temperature setting (make sure the fan is turned off).
- Choose your temperature using the digital readout and wait for the Extreme Q to heat up, less than 45 seconds typically (see Moirai’s series on vaporizer temperature settings).
- Pull a nice slow plume through the whip.
- Puff puff pass.
How to Use the Arizer Extreme Q Vaporizer Bag System
The bag attachment is a very simple system where you have to cover the bag stem hole with your finger while sharing, the upshot is that there’s no complicated valves to break. Sometimes simple is just better.
- Setup the vaporizer with the cyclone bowl (rubberized side up so you don’t burn your fingers ashing later).
- Pack in your weed.
- Top the cyclone bowl with the stubby tube elbow glass.
- Take one of the oven bags provided and attach the straight glass piece following the directions included.
- Push the bag’s glass piece into the elbow’s plastic tubing.
- Power up the Extreme Q and choose your temperature setting (make sure the fan is turned off).
- Choose your temperature using the digital readout and wait for the Extreme Q to heat up, less than 45 seconds typically (see Moirai’s series on vaporizer temperature settings).
- Turn on the fan to fill the bag (speed 1, 2, or 3 all produce good results, I typically rotate through fan speeds as I fill the bag 3 times)
- When the bag is full, turn off the fan (I love the remote for this), pull the bag off of the elbow tube. Make sure to keep your finger over the glass tube hole so you don’t lose the vapor.
- Puff puff pass (keeping that finger over the hole).

Arizer Extreme Q Vaporizer Tips and Tricks
Here’s a tips and tricks that we learned while using the Arizer Extreme Q:
- Elbow pack FTW! Once I figured out how the elbow pack worked, I never went back. This tip seems a bit counter-intuitive at first, packing your weed upside down just doesn’t make sense, but packing your weed into a small space to force the hot air through it, that makes all the sense in the world. One other tip, if you go this route, try to ash your elbow while it’s still relatively hot. It’s much easier that way. I let one of my last bowls of the evening cool overnight and it was a PITA to clean out in the morning. Nothing the glass poker (included) and a little rubbing alcohol can’t handle in seconds, but still good practice to keep your tools clean.
- Never use regular plastic bags with any vaporizer. The hot air from the vaporizer could melt the plastic and release NASTY STUFF YOU DO NOT WANT IN YOUR LUNGS. The bags included with all reputable vaporizers are essentially the same as oven bags available at Amazon.
- Clean your screen while it’s hot. It’s much easier that way. The occasionally rubbing alcohol bath for all glass pieces and screens is a good idea too.
- The remote control, while it seems like a frivolous novelty, is actually very useful. The single best use of the remote for me, was instant fan control. With one button you can select level 1, 2, 3 or off. And bonus points because the fan is so quiet, a small high pitch is all you hear.
- I used all of the fan speeds with the bag whip setup. I would start with speed #3 to give me a quick full bag, then step down to speed #2 for the second bag and finally speed #1 for my third bag. I’m still working on the best temperatures and speeds for my taste.
- Some folks use their remnants after vaping (Already Been Vaped or ABV), read up a bit on ABV and recipes using ABV from our friends at Beyond Chronic.
Tags: arizer, product reviews, Tips and Tricks, Volcano.
By:
 Rob Schmidt. Permalink:
  Shortlink: http://weedi.st/pksES